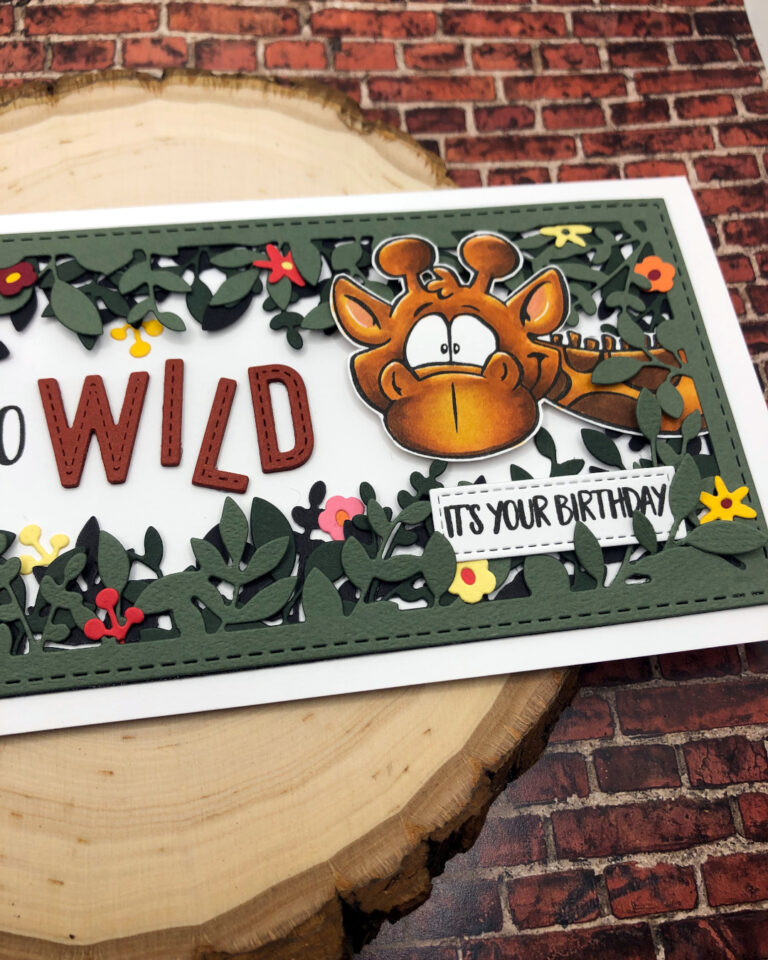
We have a soft spot for adorable critters and these peeking giraffes by Whimsy Stamps are just too cute for words! The Foliage Frame slimline die from Trinity Stamps set the lush jungle scene and the stitched alphabet die from Heffy Doodle paired well with the overall look we were going for.
Focal Point:
- This stamp set comes with three adorable giraffe images. We stamped them onto white 80 lb cardstock using My Favorite Things Extreme Black ink which is copic-friendly.
- The images were colored with alcohol markers and then they were fussy-cut
- The letters to spell ‘WILD’ were die cut four from brown cardstock and then stacked and glued together to create dimension and add strength.
- The sentiment “Its Your Birthday” was stamped onto white 80 lb. cardstock with Versifine Onyx ink and cut out with a stitched rectangle die.
- The foliage frame was cut from each of the following cardstock colors: black, dark green and medium green.
- Flowers were die cut, assembled and glued together using scraps of pink, orange, red and yellow cardstock
Card Assembly:
- A white slimline note card measuring 4” x 9” was created from 120 lb cardstock.
- The three foliage frame die cuts were stacked and glued together in the following way: the black die cut was flipped face down so the ‘backside’ of the die was facing up. The dark green die cut was then glued to the black foliage frame die cut (you will be gluing the ‘backsides’ of each die cut together in this step). The medium green die cut needs to be turned so that the leaves are pointing in the opposite direction of the dark green leaves and then it is glued in place. When finished, you will have one foliage frame piece with the leaves of each layer pointing in different directions.
- Adhere the stacked foliage frame die cut (black side down) to the front of the white card base. Adhere just the outer border of the die cut so that the leaves can still move. This will make it easier to place the giraffes and flowers within the foliage.
- Plan where to place your giraffe images and the sentiments making sure to leave enough room for everything.
- Stamp the word “GO” onto the white card base according to your placement plan. This should be stamped first and then the alphabet dies can be glued in place.
- Place the giraffes within the layers of leaves so it looks like they are peeking out of the jungle and adhere in place. Use foam tape to adhere their heads for a little dimension.
- Without covering the text, place the small sentiment strip within the layers of leaves and adhere in place with foam tape.
Finishing Touches:
- Place the flowers scattered around the frame and within the layers of leaves adhering in place with liquid glue.
- There was a ‘peeking’ giraffe image left over so we added him to the inside of the card with some extra leaves that were cut from the die set. This is completely optional.
We hope you enjoyed this project and will give it a try. Thanks for stopping by today. Stay safe and happy crafting!
Maureen and Michele
“Life is mostly froth and bubble; two things stand like stone: kindness in another’s trouble, courage in our own.”
Adam Lindsay Gordon
Supply List:
- Giraffe Images: Whimsy Stamps – “Giraffes Peeking”
- Stitched Alphabet Die: Heffy Doodle – “Stitched Alphabet”
- Slimline Foliage Frame and small flower dies: Trinity Stamps – “Foliage Frame Slimline”
- Outside Sentiments (“It’s Your Birthday” and “GO”): Avery Elle – “Peek-a-Boo Pets”
- Stitched Frame Die (to cut out sentiment): My Favorite Things – “Inside & Out Stitch”
- Inside Sentiment: Penny Black – “Birthday Love”
- Alcohol markers: Copic – “Sketch”
- YR23, E97, YR27, E99, E59, R83
- Cardstock for giraffe images: Accent Opaque – 80 lb. white
- Cardstock for cardbase: Accent Opaque – 120 lb. white
- Liquid adhesive: Art Glitter
- Colored cardstock: Our stash – unknown
- Black Hybrid Ink (Copic Colored Images): My Favorite Things – “Extreme Black”
- Pigment Ink (Sentiment): Versafine – “Onyx Black”


No Comments