Hello crafty friends! Sometimes a new product release just tickles your fancy and for us, Honey Bee Stamps’ recent release called Adventure Awaits was one of those. Nearly every product in that release ended up in our cart, LOL. Today’s card project was created using several items from that release and we had so much fun putting this beautiful outdoor scene together. We hope it inspires you.
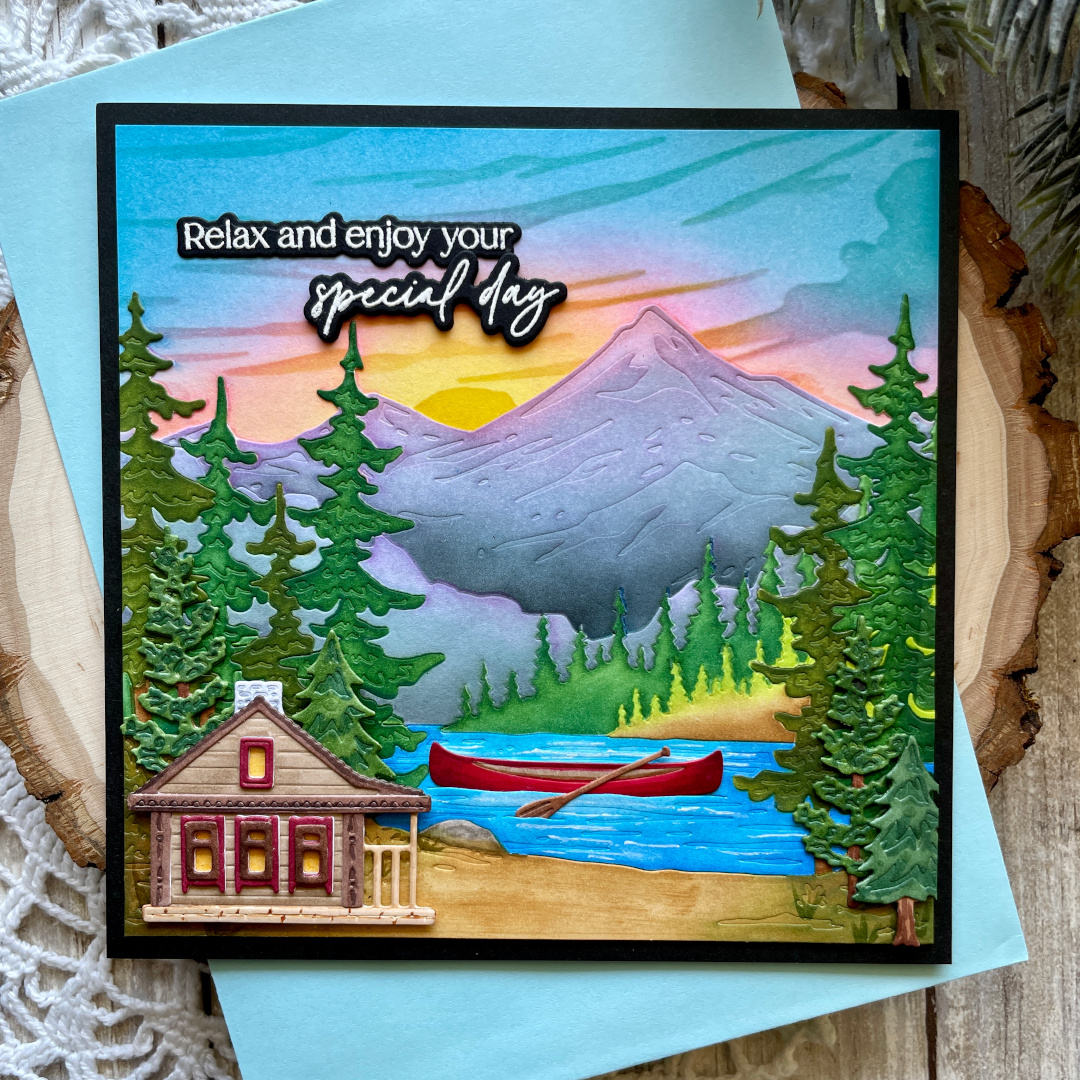
Focal Point
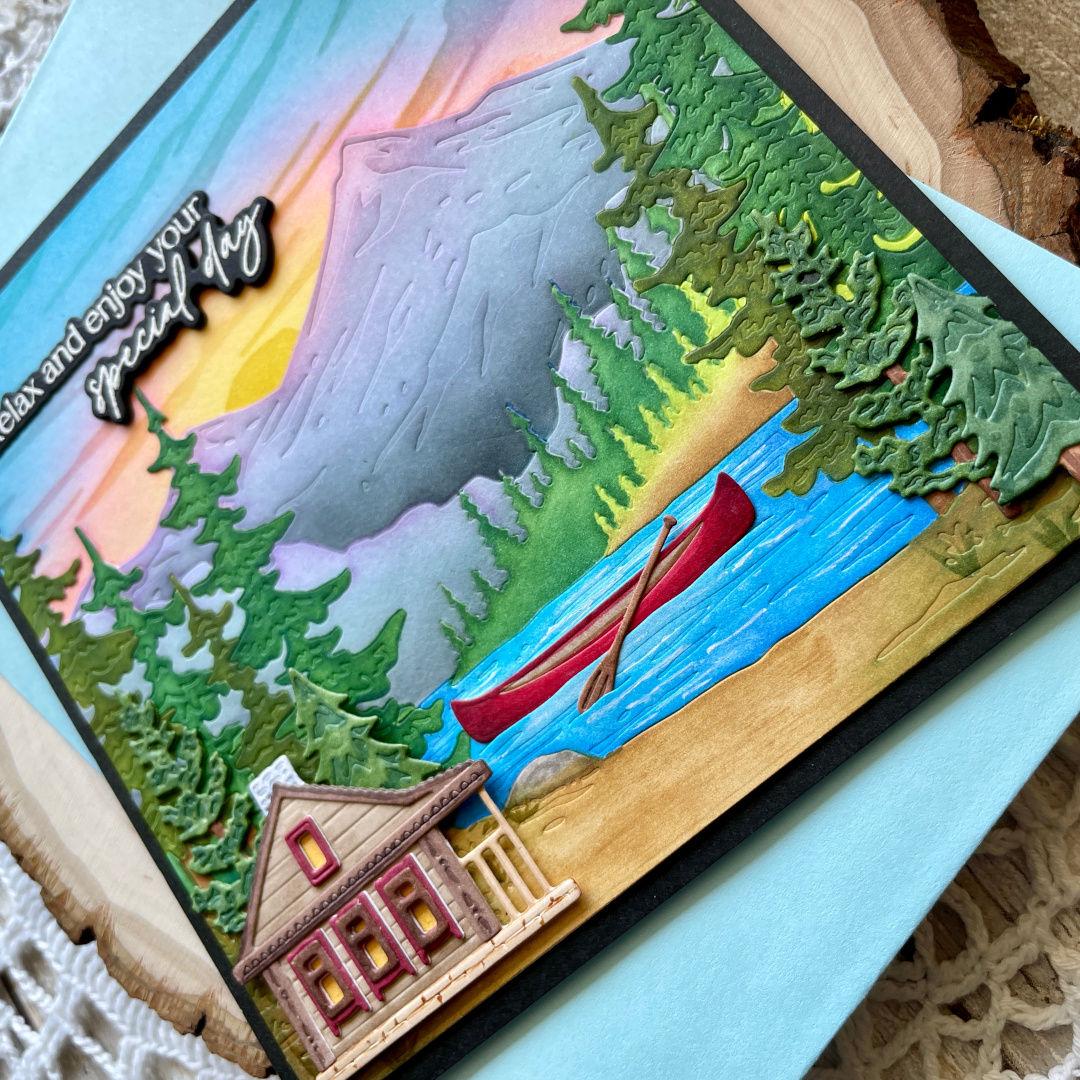
- The mountains, canoe, oar, cabin and trees were all cut from white 80lb cardstock using the dies.
- The stencils were used to blend Distress Ink onto the mountain scene diecut. After the ink blending was complete, alcohol markers were used to add in small amounts of detail here and there. A white gel pen was used to add detail to the water which was then coated in clear shimmer using a glitter marker. This diecut was trimmed to 5-1/4″ wide and set aside.
- The cabin, canoe, oar and tree diecuts were colored with alcohol markers, assembled with liquid glue and set aside.
- The sentiment was stamped with embossing ink onto black cardstock, covered with white embossing powder and heat set. The sentiments were cut out using the coordinating dies. Several additional layers of the “special day” sentiment were cut using the die and stacked/adhered under the embossed sentiment with liquid glue.
Background Panel
- A card panel measuring 5-1/4″ x 5-1/4″ was cut from 80lb white cardstock.
- The mountain scene stencil set was used to blend Distress Ink directly onto the top of this panel creating the sun and sky.
- The mountain die was adhered to the bottom of this panel with liquid glue.
Card Assembly
- The canoe and oar diecuts were inserted into the slots created by the mountain scene die and adhered with liquid glue.
- The additional tree diecuts were adhered to the panel with liquid glue and foam tape.
- The cabin was adhered using foam tape.
- The sentiments were adhered to the panel with liquid glue.
- The entire card panel was adhered to a 5-1/2” x 5-1/2” piece of black cardstock which was then adhered to a 5-1/2″ x 5-1/2″ side-folding card base.
We hope that sharing our card with you today has inspired you to create! As always, we are so thankful for your visit.
Crafty hugs,
Maureen and Michele

Supply List
- Cabin: Honey Bee Stamps – Summer Cabin
- Mountain Scene & Canoe dies: Honey Bee Stamps – Into the Blooms: Cherry Blossoms
- Mountain Stencils: Honey Bee Stamps – At The Lake
- Sentiment: Honey Bee Stamps – Be Still
- Distress Inks: Ranger
- Alcohol Markers: Copic Sketch
- Glitter marker: Scrapbook.com – Clear glitter
- Cardstock:
◦ Card panel: Accent Opaque 80lb.
◦ Card base: Accent Opaque 120lb.
◦ Black: Hero Arts – Hero Hues Pitch Black - Embossing Ink: Tsukineko – VersaMark
- Embossing Powder: Brutus Monroe – Alabaster
- Liquid glue: Bearly Art – Precision Craft Glue
- Foam adhesive: Scrapbook Adhesives by 3L – Crafty Foam Tape


No Comments