Hello crafty friends! We are back with a new card project that embraces the upcoming fall season. Here in Western NY, it has felt more like autumn than summer this past week so today’s card seems fitting.

Focal Point:
- A stamping platform was used so that some of the images could be stamped multiple times.
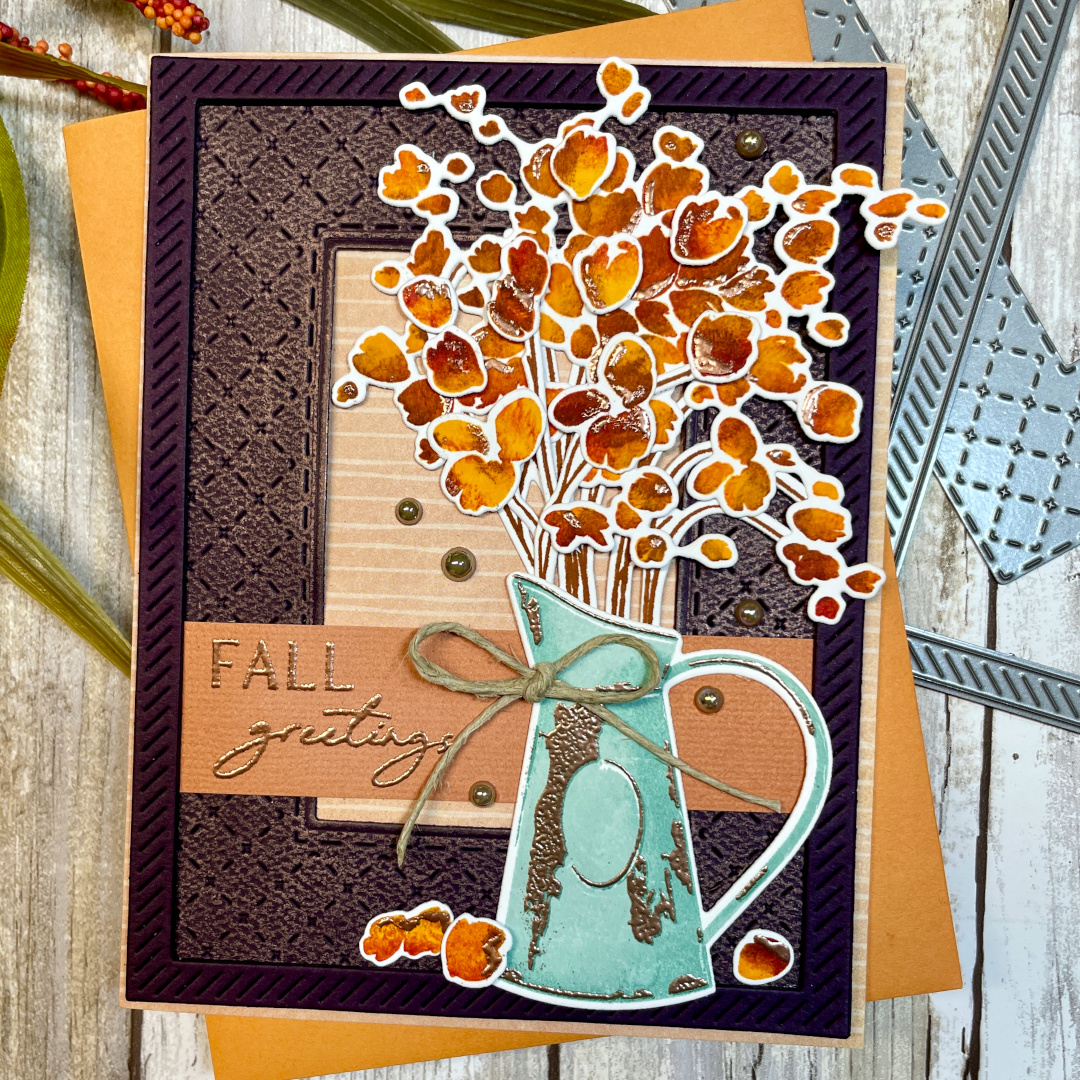
- Starting with the pitcher, the first layer was stamped with a light teal ink. Using a small blending brush, a darker shade of teal ink was added to the outer edges of the stamp and stamped over the light teal ink to add some shading and depth. The second layer of the pitcher was stamped using embossing ink, covered with embossing powder and heat set.
- The branches were stamped with brown ink.
- The leaves were all stamped first with a yellow-orange ink. The stamps were inked again with the same yellow-orange color and then, using small blending brushes, dark red and dark purple ink was randomly added to the stamps over the yellow-orange ink (trying to avoid harsh edges of color). This multi color of ink was then stamped over the solid yellow-orange layer of ink that was previously stamped. This step was repeated a second time to achieve the desired look.
- All images were cut out with the coordinating dies.
- Using a VersaMark pen, embossing ink was randomly added to small areas on some of the leaves which was then covered with embossing powder and heat set.
- The sentiment was stamped onto a 1” x 3-9/16” strip of apricot cardstock with embossing ink, covered with embossing powder and heat set.

Background Panel:
- Deep plum colored cardstock was used to cut the wide stitched frame die. Using a finger tip, metallic rub-on was lightly added to the top of the diecut to enhance the debossed detail on the frame.
- A thin diagonal frame was cut once from the same deep plum colored cardstock and twice more from black cardstock. All three layers were adhered together with liquid glue so that the plum layer was on top.
- A piece of patterned paper was cut to 4-1/4” x 5-1/2”.
Card Assembly:
- The patterned paper was adhered to a side-folding A2 card base created with 120 lb. white cardstock.
- The thin diagonal frame was adhered to the outer edge of the wide stitched frame diecut with liquid glue. Anything that extended beyond the thin diagonal frame was trimmed off. This layered frame diecut was then adhered to the center of the card base with liquid glue.
- The embossed sentiment strip was adhered with liquid glue.
- The pitcher, branches and leaves were glued in place with liquid glue. Some of the loose individual leaves were adhered on top with a thin foam square.
Finishing Touches:
- Metallic pearls were adhered randomly with liquid glue.
- A small bow was tied with jute and adhered in place with a small glue dot.
We hope you enjoyed our project today. We greatly appreciate that you stopped by.
Crafty hugs!
Maureen and Michele
Supply List:
- Images: Papertrey Ink – Abundant Blooms (stamp and die sets)
- Sentiment: Papertrey Ink – Larger Than Life: Fall Sentiments
- Inner Frame: Papertrey Ink – Border Bling: Tin Stitched
- Outer Frame: Papertrey Ink – Skinny Diagonal Frame
- Embossing Powder: Tonic – NUVO Fine Detail Copper Blush
- Embossing Ink Pad: Tsukineko – VersaMark
- Embossing Pen: Tsukineko – VersaMark
- Dye Ink: Catherine Pooler – Glitz, Cranberry Fizz, Glam, Hot Tub, Skylight, Spiced
- Liquid Glue: Bearly Art – Precision Craft Glue
- Foam Square: 3L Scrapbook Adhesives – Thin 3D Foam Squares
- Metallic Pearls: Pinkfresh Studio – Sparkling Champagne
- Metallic Rubons: CRAF-T – Rosewood (Color Kit #3)
- Cardstock:
- Cardstock and patterned paper: Source unknown
- Stamped images: Accent Opaque 80lb.
- Card base: Accent Opaque 120lb.


No Comments