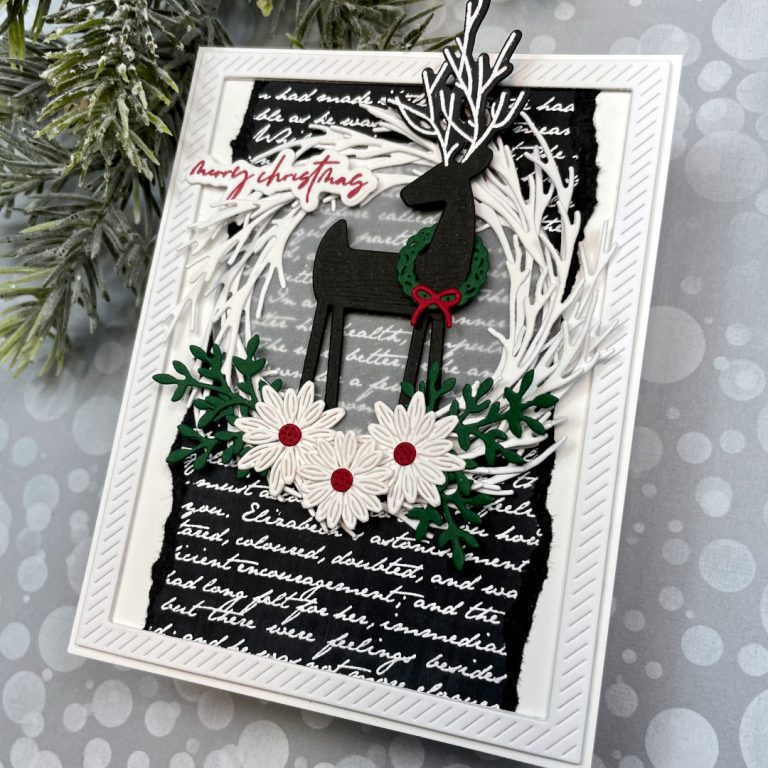
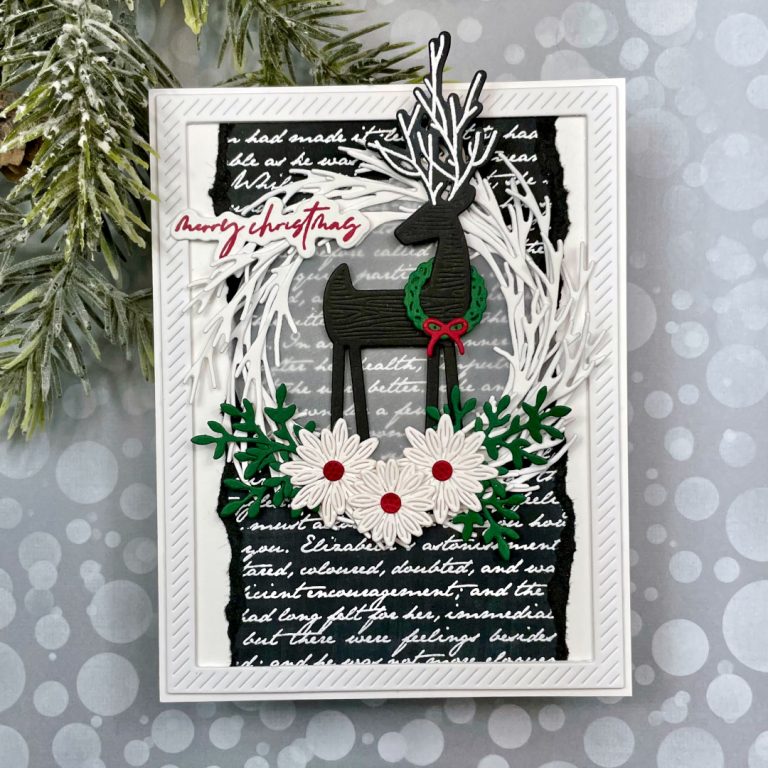
One of our favorite paper crafting techniques is die cutting. We simply find the process of cutting and gluing small pieces of paper together to create something beautiful so relaxing and enjoyable. Our card project today was created mostly with die cuts – there was very little stamping involved. We are pleased with how it turned out and hope you think so too!
Focal Point:
- The deer was cut from black cardstock. We lined up the antlers onto a stamping platform using the negative space (we find this to be the best way to get great alignment). Once the stamp was in position, we put the die cut inside the negative space and stamped the antlers onto the die cut using embossing ink. White embossing powder was added and then it was heat set.
- The wreath twigs were cut several times from 80 lb white cardstock. Using liquid glue, the twigs were adhered to the outer edge of a 3” circle that was cut from vellum. The twigs were layered to overlap several times until we were satisfied with the look.
- The mini wreath was cut from green cardstock and the bow was cut from red. Using liquid glue, the bow was adhered to the bottom of the wreath. A slit was cut at the top of the wreath so that it could be placed around the deer’s neck and tape was used to secure it in place.
- The sentiment was stamped onto an 80 lb piece of white cardstock with red dye ink. The coordinating die was used to cut it out after the ink was dry.
- Several small and large flowers were cut from white cardstock. The flower centers were cut from red and the flowers were adhered with liquid glue.
- Several leaf branches were cut from green cardstock.
- The flowers and leaf branches were arranged at the bottom of the twig wreath. Once satisfied with the placement, they were adhered in place with liquid glue and foam adhesive squares. The deer’s legs were tucked behind the flowers and adhered to the vellum circle with liquid glue. Foam squares were added behind the deer’s back and head to give a bit of dimension and lay better on top of the twigs.
Background Panel:
- The diagonal frame was cut three times from 80 lb white cardstock. The frames were stacked and adhered together with liquid glue.
- The scripty background stamp was stamped onto a piece of black cardstock measuring 4.25” x 5.5” with embossing ink. White embossing powder was added and heat set. About ½” was then torn from each side of the embossed cardstock so the finished panel measured approximately 3.25” x 5.5”.
- The white diagonal frame was adhered onto the black embossed panel making sure to center the panel inside the frame. Any excess black cardstock hanging outside of the white frame was cut off with scissors.
Card Assembly:
- The panel was adhered to a side-folding, A2 card base created from 120 lb white cardstock.
- The deer and twig wreath was adhered to the top center of the card panel with liquid glue applied behind elements where it would not show (behind the deer, twigs and flowers).
- The sentiment was adhered using a combination of liquid glue and small foam squares.
Well, that’s it! We are grateful that you stopped by. We wish you and your family a happy and healthy holiday season!
Crafty hugs!
Maureen and Michele
“Our days are happier when we give people a piece of our heart rather than a piece of our mind!”
-Unknown
Supply List:
- Deer: Papertrey Ink – Deer to Me
- Sentiment: The Greetery – Hoop Wreath
- Wreath Twigs: The Greetery – Rustic Wreath Twigs
- Wreath around deer: The Greetery – Curio: Attic Ornaments
- White flowers: Spellbinders – Mini Blooms & Sprigs
- Green Foliage: Altenew – Branches & Berries
- Frame Die: Papertrey Ink – Skinny Diagonals Frame
- Script background stamp: My Favorite Things – Romantic Script
- Embossing Powder: Brutus Monroe – Alabaster White
- Embossing Ink: Tsukineko – VersaMark
- Red Dye Ink: Concord & 9th – Cranberry
- Cardstock:
- White 80 lb – Accent Opaque
- White 120 lb (card base) – Accent Opaque
- Black – Hero Arts Pitch Black
- Green – Concord & 9th Evergreen
- Red – Concord & 9th Cranberry
- Vellum – source unknown


No Comments