Welcome! Thanks so much for visiting today.
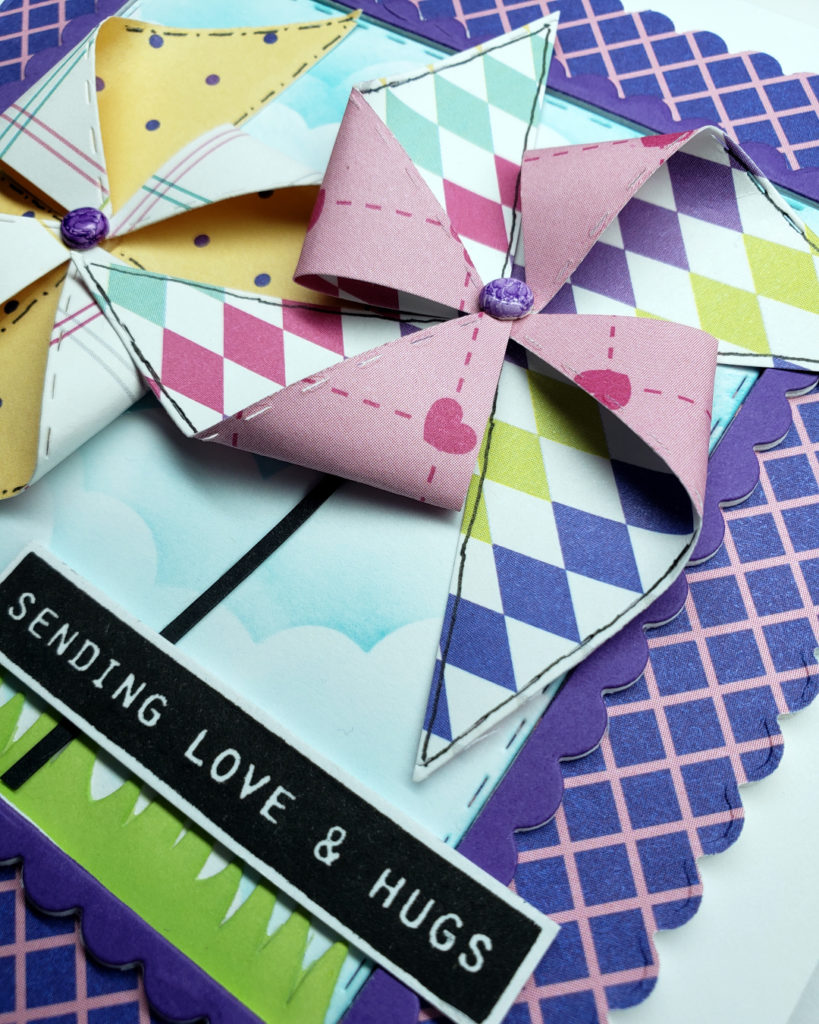
We have been on a mission to incorporate more patterned paper in our cardmaking and the card we are sharing today uses a lot of it! We saw a larger version of this basic pinwheel design on some packaging while at the store and thought it would make a cute element for a card. In order for all our patterns to coordinate, we chose to use papers from the “Something Whimsy” 6”x6” paper pack by Pink & Main. We love the designs, and they all go together beautifully.

Focal Point:
- To make the pinwheels: Basic stitched squares were cut from the selected patterned paper using a die.
- The squares were then cut from each corner in toward the center of the square, being careful to stop the cut approximately ¼” away from the center – Don’t cut all the way through!
- After all 4 corners were cut, every other corner point was gently bent into the center of the square, again using care not to “crease the folds” of the pinwheels. The bent corners were secured in the center of each pinwheel using a tiny brad.
Background Panel:
- A scalloped frame was created by using a scalloped square die and cutting out the center using a stitched square die that was slightly smaller. This frame was cut once from purple cardstock and 3 more times from white cardstock. The frames were stacked and adhered together with liquid glue to form a thick, dimensional frame.
- One of the “negative space” white stitched die cuts that was left over from creating the scalloped frame was stenciled using a cloud stencil, and die cut grass was added to create a scene on which to adhere the pinwheels.
Card Assembly:
- A 4 ¾” scalloped square was cut 4 times; once from purple patterned paper, and 3 times from white cardstock. The layers were stacked and adhered to create a dimensional mat on which to mount the pinwheels.
- The scalloped frame was centered and adhered to the scalloped mat.
- The background scene was adhered inside the frame.
- The pinwheels were adhered inside the frame.
- Very thin strips of black cardstock were cut and adhered behind the pinwheels to make the “sticks”.
- The sentiment was stamped with black ink on a white cardstock scrap, and was trimmed down with scissors, leaving a very thin white border around the stamping.
- The sentiment was adhered under the pinwheels with foam tape.
- The entire matted scalloped panel was adhered to the center of a 5 ½” square card base.
This card was fun to make, and very different from our usual “style”. We hope you like it! As always, we are grateful that you stopped by to take a peek! Stay well!
Michele & Maureen
“The world is full of kind people….if you can’t find one, be one”
Unknown
Supply List:
- Patterned paper: Pink & Main – Something Whimsy
- Square dies: The Stamps of Life – Stitched Squares, Pink & Main – Scalloped Squares
- Cloud stencil: My Favorite Things – Mini Cloud Edges
- Grass: Hello Sweetums – Grass is Greener die set
- Sentiment: Altenew – Best Stentiments
- Card Base: Accent Opaque 120 lb. white cardstock
- Background ink: Tim Holtz/Ranger – Distress Oxide Inks
- Clouds: Peacock Feathers
- Grass: Mowed Lawn


No Comments